ACCESSING OLIVO CRM:
Learn how to use the features and modules of the Olivo crm with the help of our resources.
When you are about to use our olivo crm for the FIRST TIME:
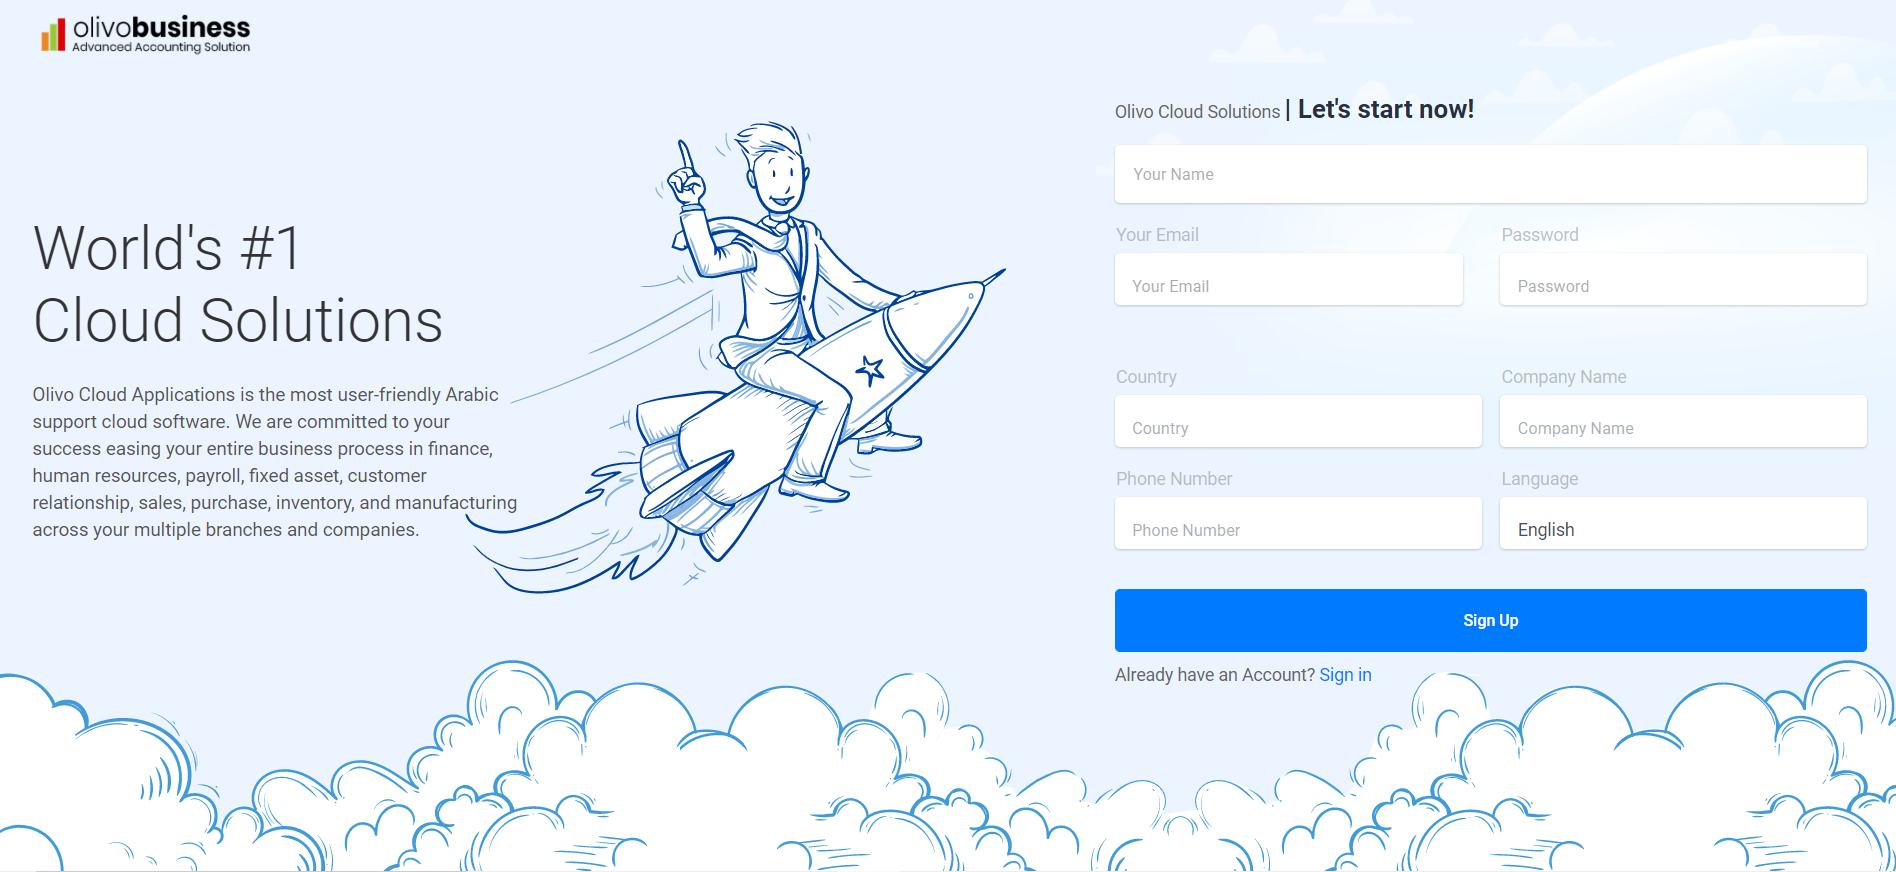
- If you are a new user, Click on the sign up button available in the left side of the page.
- Get started by entering your details in the required fields and click Sign Up.
- Now you are ready to use the smartx with your created account.
Choosing the required application:
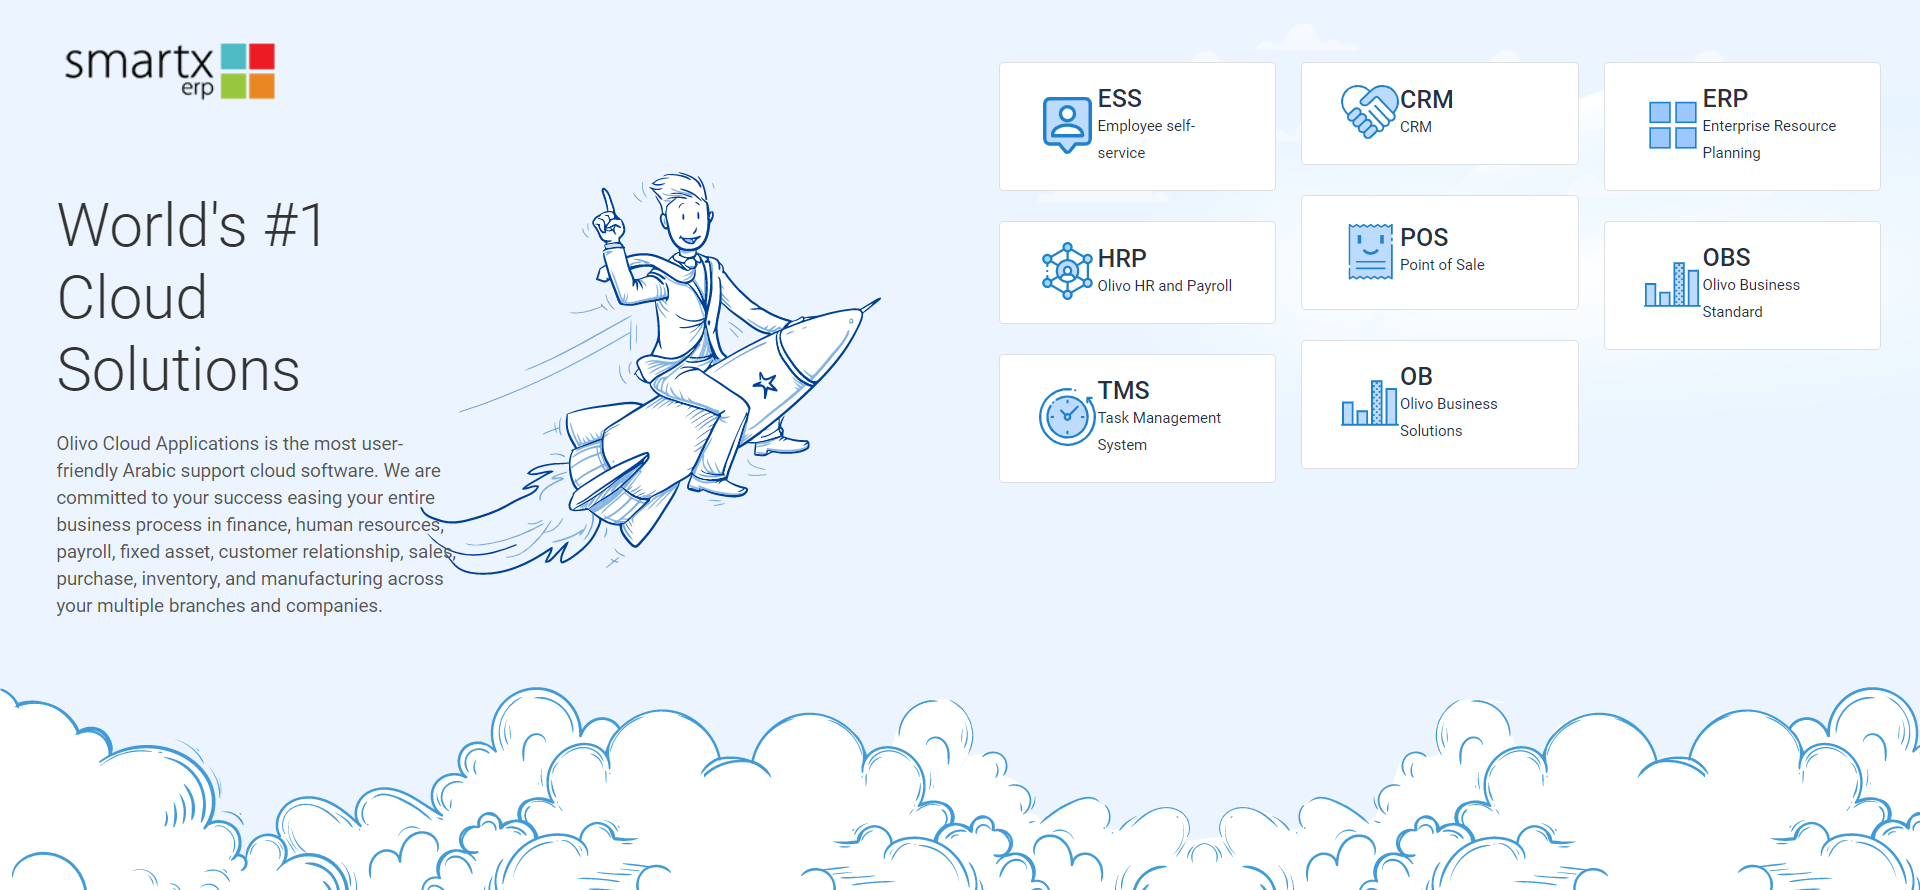
- List of all the available applications will be displayed. Choose the required application to access the functionalities.
- Once logged in to the application, you will be displayed with the selected application’s functionalities as a default option.
- You can also change to other applications containing different functionalities by clicking on the
icon.
Sign in into olivo CRM:
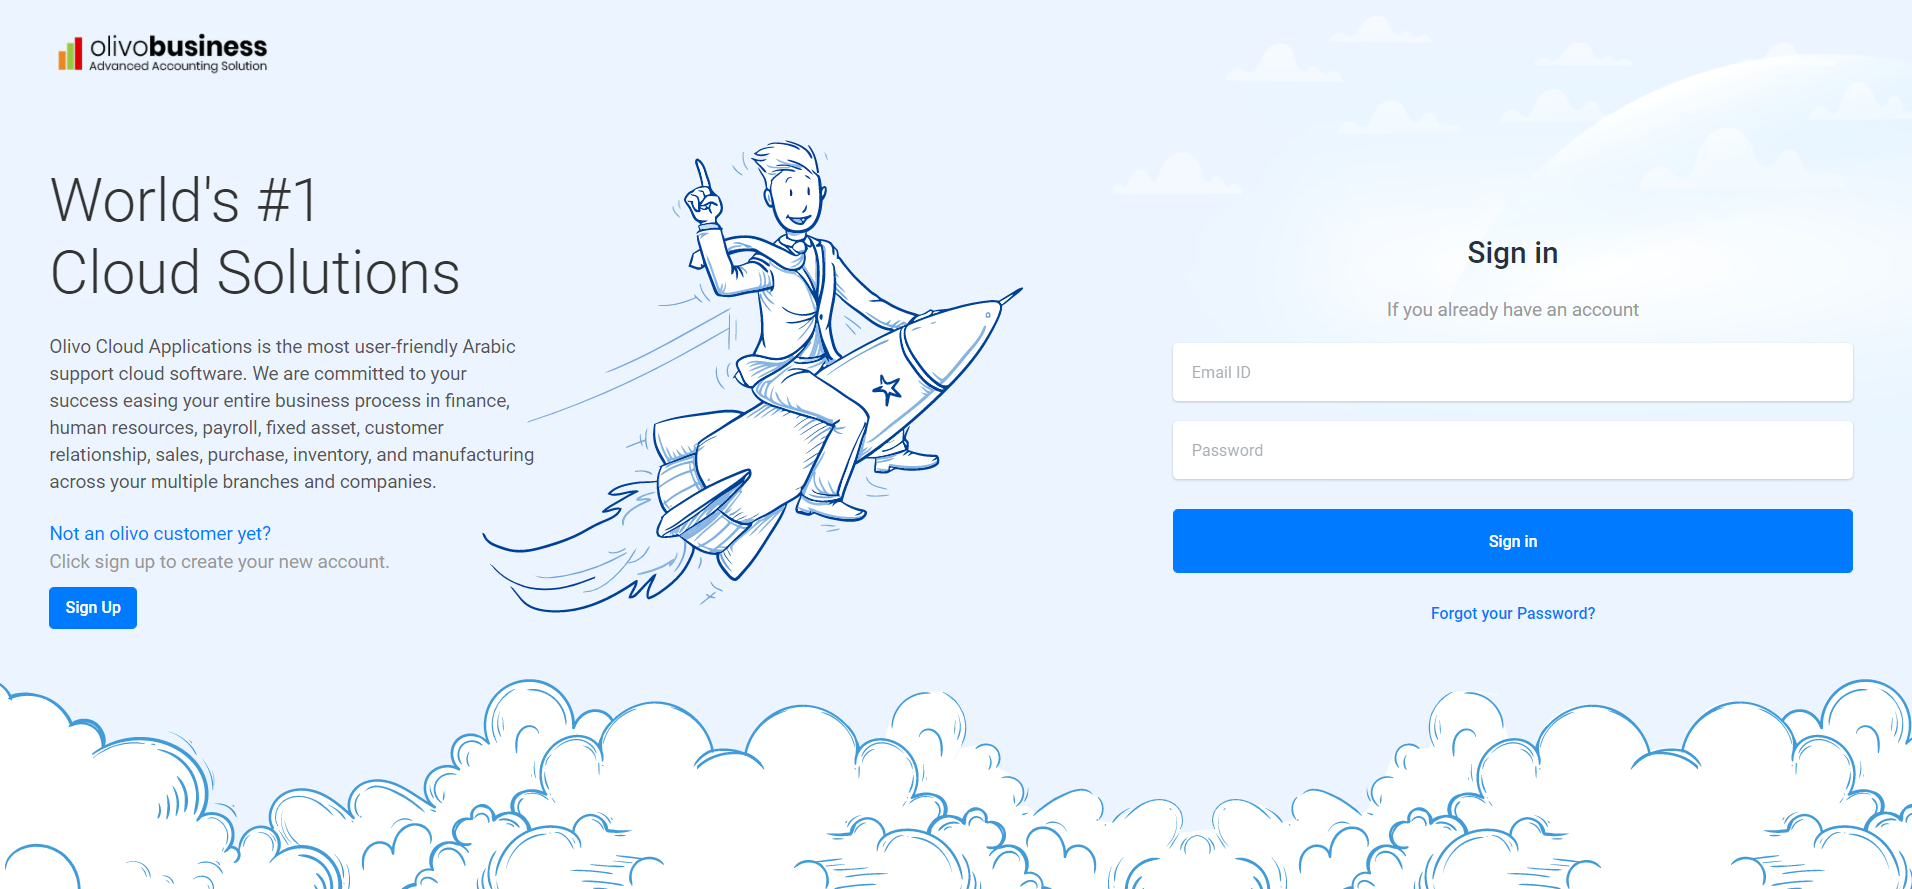
If you already have an account in olivo crm,
- Enter your registered Email ID,
- Enter your password.
- Click on the sign in button.
- In case you have forgotten your password you can reset your email id using forgot your password? option.
Browser Support:
Olivo crm is a well-designed application that supports all the browsers to provide a good user experience. The application supports the latest versions of all these browsers.
- Chrome
- Firefox
- Safari
- Edge
- Internet explorer
HOW OLIVO CRM WORKS
To use the functionalities of our application, all you need is web browser and internet connectivity.
Accessing Olivo crm:
To access olivo crm, you’ll have to sign up with your registered Email Id and password.
Migrating from other software:
In case you are migrating from other software to smartx CRM, you would need to import various fields such as the leads, probability, and project details list to have a smooth transition.
Upload initial data:
To import the details of leads, contacts and companies :
- Click on Settings
icon->Upload initial data->Choose file.
- Click on click here to download the template option to download template
- Select the required importing file, by clicking on search field.
- Then click on import button.
- Follow above steps for importing the details of your contacts, leads and project details.
Dashboard:
Dashboard gives you a clear picture of the organization’s overall current status.It gives an overview on the revenue and opportunities details, through two dimensional charts and graphs.
NAVIGATING OLIVO CRM:
Get to know our application:
There are many features available in our crm to ease your work experience.
Sidebar:
This section contains all the available modules, which helps you to quickly navigate from one module to another module. It includes different modules that ensure you to do different actions like creating leads, opportunities, contact, companies, projects, workflows.
Switch language:
- You can switch between two languages (English, Arabic) to view the contents of the website according to your wish.
- Clicking on the
icon, switches from one language to another.
- When the contents are being displayed in English, you can switch to Arabic by clicking on the
icon.
Profile:
- Displays the details of the user with display picture.
- Contains option to change the password and to sign out.
USING THE INTERFACE:
A good user interface provides a user-friendly experience, allowing the user to interact with the software in a natural and intuitive way.
In this crm you will come across different fields to make use of the functionalities.
The Fields:
-

Mandatory fields: The field with red asterisk mandatorily requires data to be entered. -

Optional fields: These fields are optional to enter.
The Field Types:
-

Text: Field that requires text. -

Number: Field that requires numbers. -
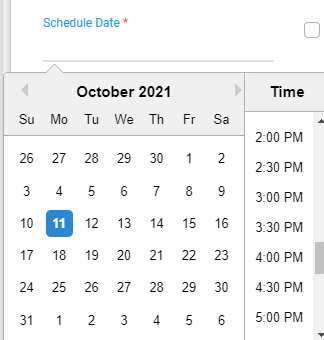
Date: Field that requires date to be entered. Click on the field to select the required date from the calendar. -
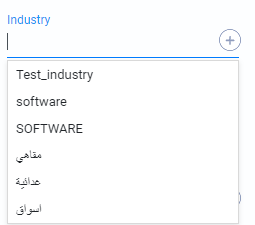
Selection: You can select the required element from the list or add a new element. -

Checkbox: This field is represented by a box that you can enable or disable as a response. -

Description: This field requires text and allows multi-line text input.
Buttons:
| Buttons | Description |
|---|---|
 |
: Search bar that lets you find the entry you are searching for. |
 |
: Buttons which forward to the previous or the next page. |
 |
: Allows you to add new entries |
 |
: Submits the current form data |
 |
: Clears the data entered. |
 |
: Closes the current screen |
 |
: Attaches document to the field |
 |
: Contains options or smart links that redirect you to other modules. |
 |
: Enables to edit the data. |
 |
: Deletes the selected data |
In this module you can,
CRM Dashboard
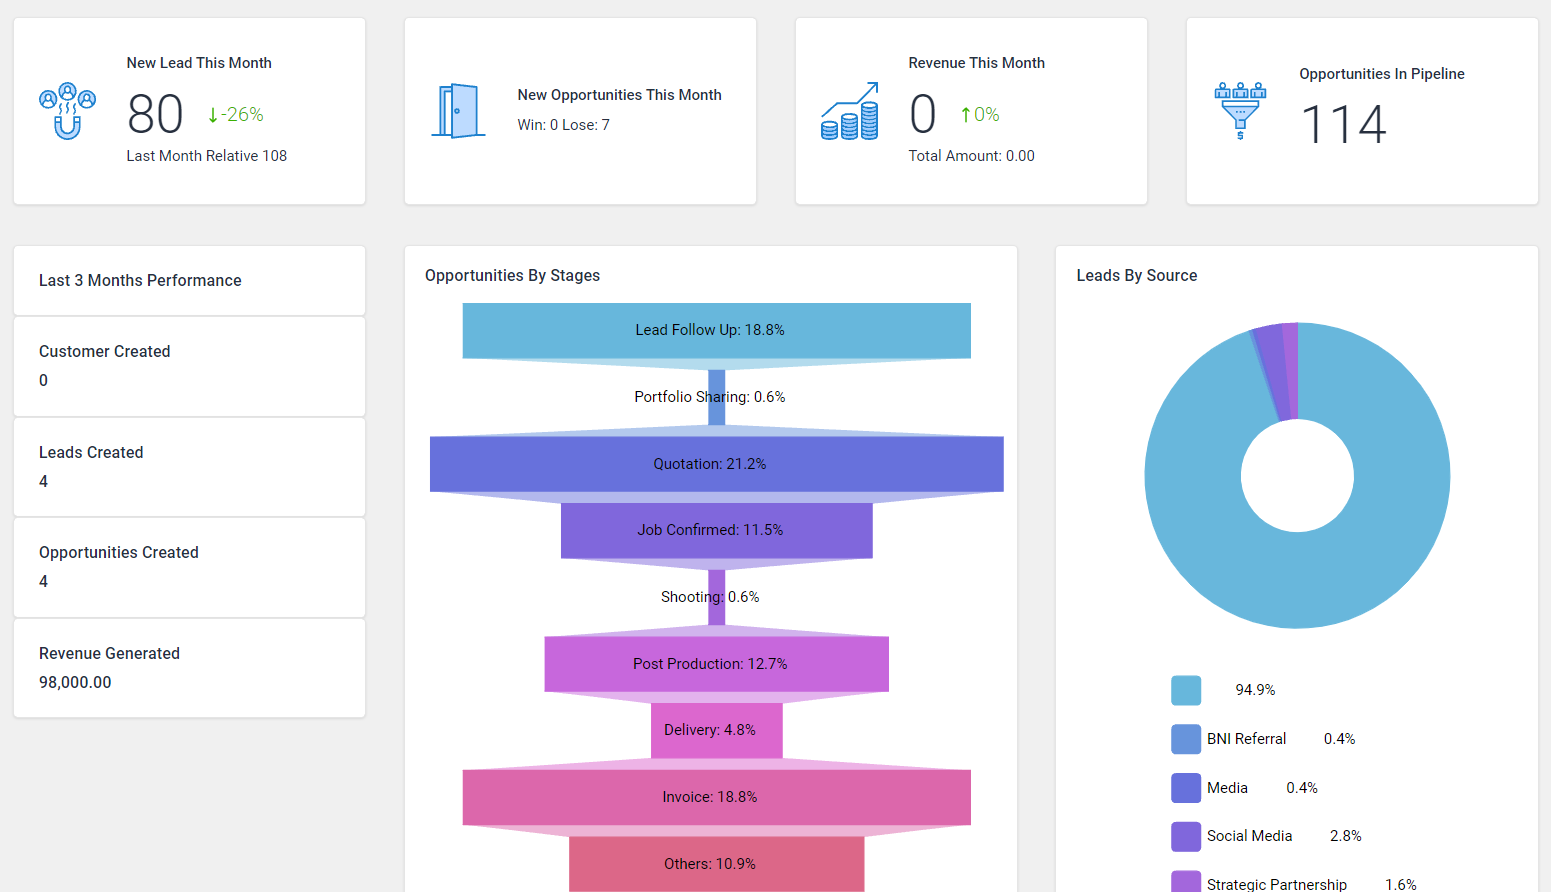
This dashboard displays the overall data regarding the revenue, leads and opportunities of the organization for the current month. Data visualization is represented in two dimensional charts or graphs.
Click on CRM Dashboard to view the data collection.
Leads
To add the lead’s details:
Click on Leads option in the side bar.
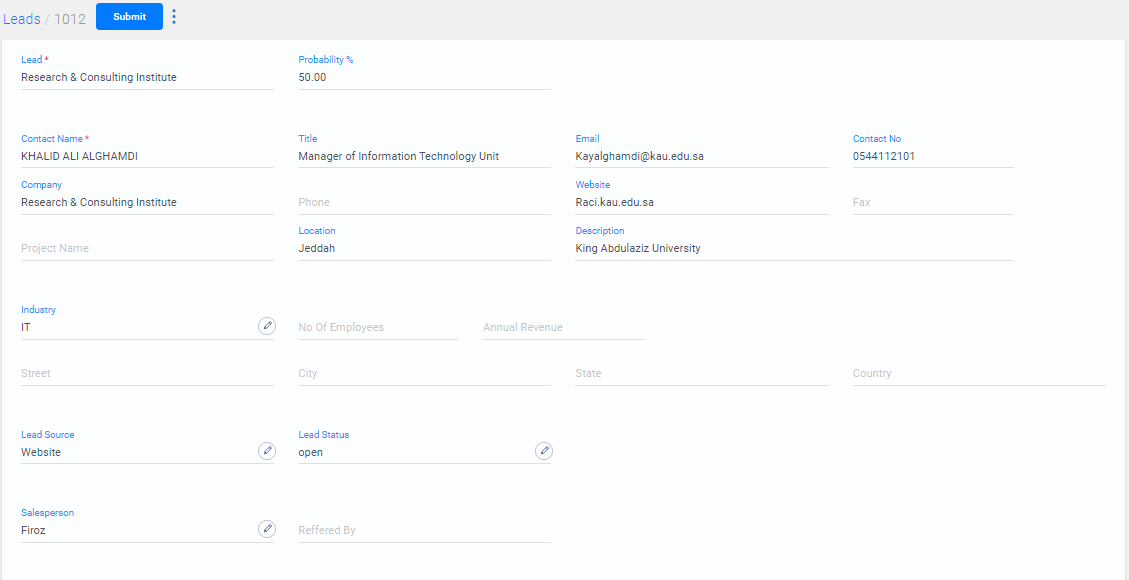
- To add a new lead details, click on create new button.
- Enter the lead, contact name, probability of the lead to become a client and other contact details.
- Enter the category type of the lead's prime business activity, in the field Industry type.
- Enter the status and source of the lead.
- Click on submit button.
- All the details of the available leads will be displayed; you can either view or edit them, if needed.
-
You can export the available lists and data in csv format by clicking on
 button.
- To view any particular lead details, search with its name in the search field.
- Select the particular lead
-
Click convert to opportunity option
available in the
 icon.
icon.
- Choose the company name, contact and project name from the available list or select the create new checkbox to add the entered data to the list automatically.
- Note:
- You should enter optional fields like company name, project name and contact details while creating leads which enables you to select the create new checkbox.
To convert a lead to opportunity:
Opportunities
To add the opportunity details, click on Opportunities option in the side bar.
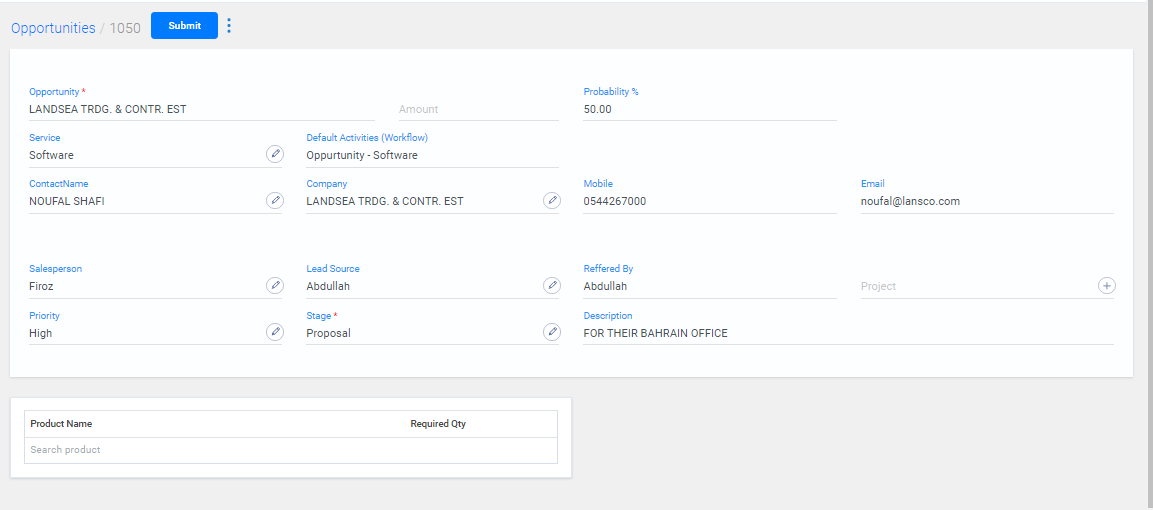
- To create a new opportunity, click on create new button.
- Enter the opportunity name, probability percentage and contact details.
- Mention the stage in which the opportunity is in progress.
- Select the required products and its quantity that are needed for the opportunity.
- Click on submit button.
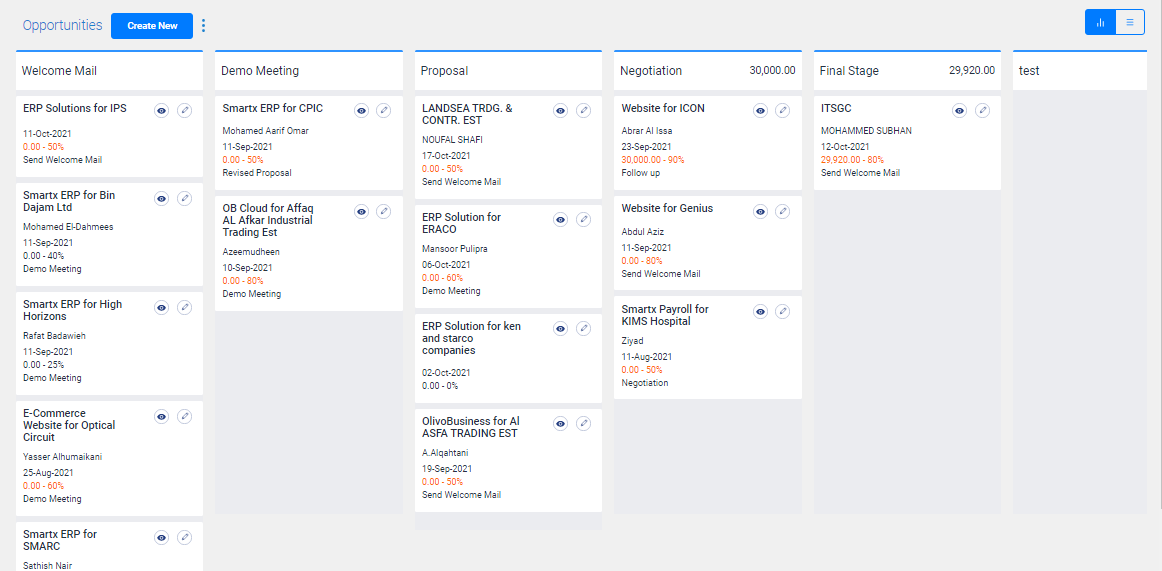
- When the leads are confirmed to become a client, convert it into opportunity.
- Create stages to categorize the activity’s progress and to finalize the completed activities.
- Mention the stage in which, the opportunity is in progress now.
- The lead is now displayed under the stage in which it is in progress.
-
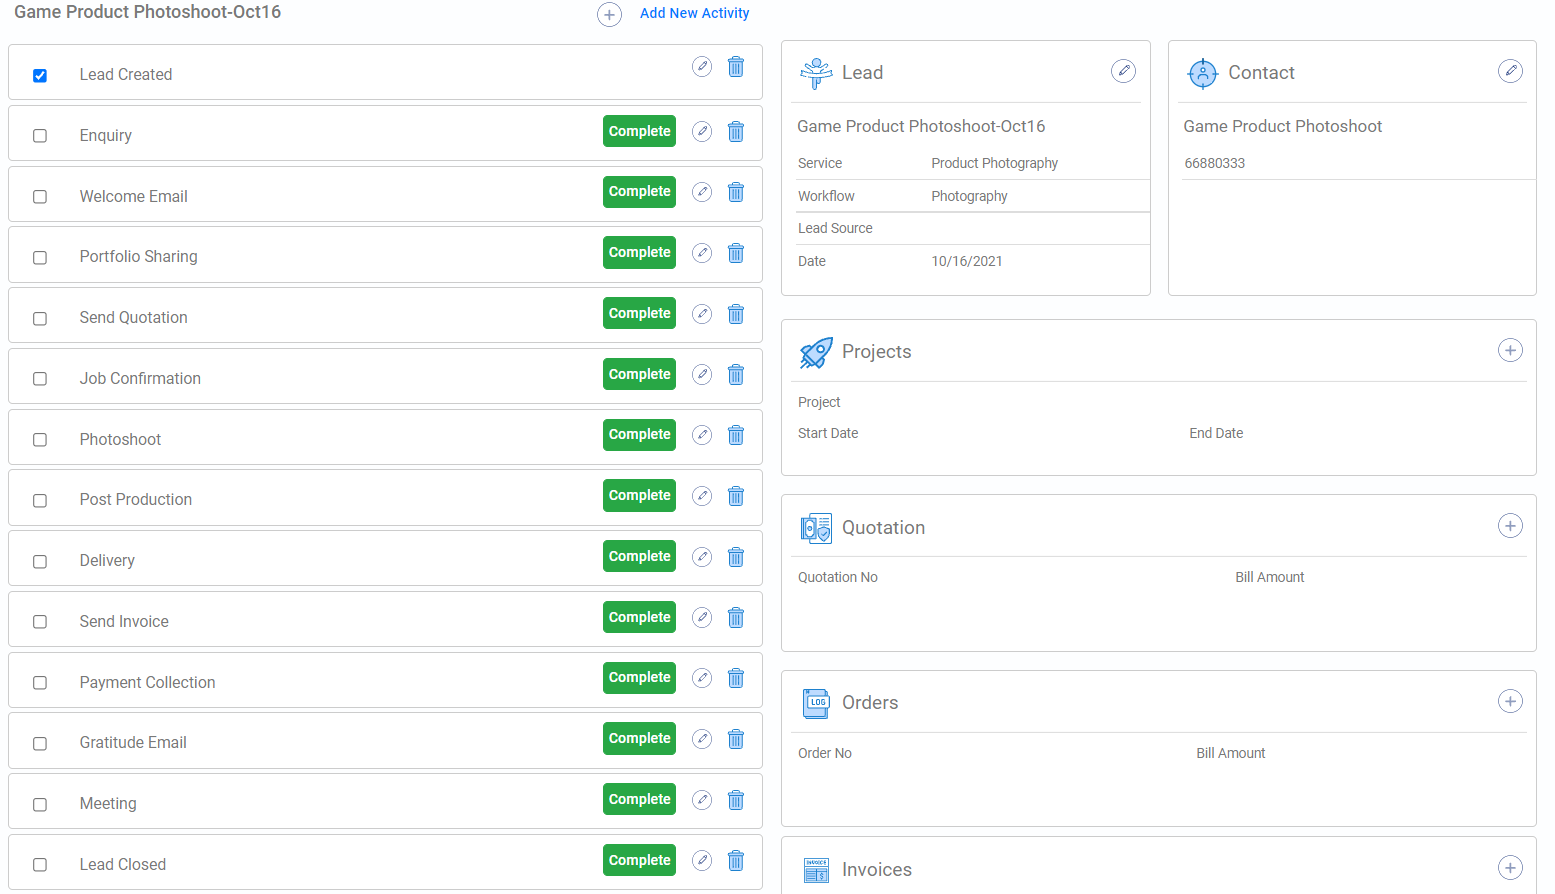
You can edit the activities details by clicking on the
icon .
-
You can change the status details of the activities
by clicking on the
icon.
- You can create projects, quotation, orders, invoice and add notes or files to the opportunities
- Click on the complete button when the activity is done. This moves the activity to next stage.
- If the activities are successfully completed, close the opportunity with a success note.
- If the deal is not successful, mention the reason for closing the opportunity with the status note and close the opportunity.
-
View type can be change based on stages or list view
of the opportunities
.
- You can also the move the opportunity from one stage to another when completed by dragging them to the respective stage.
- Watch Video
Converting a Lead as opportunity:
Contacts
To add the contact’s details:
Click on Contacts option in the side bar.
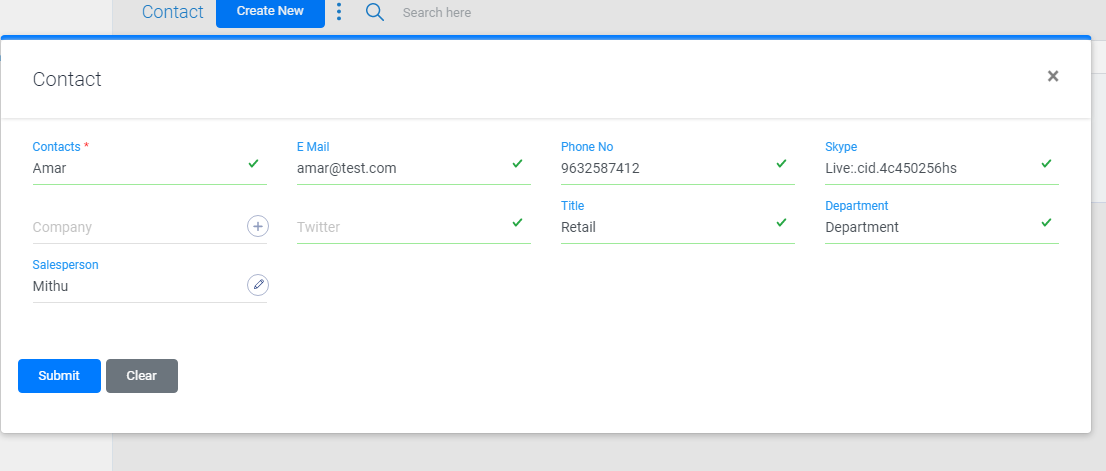
- To add a new contact detail, click on create new button.
- Enter the contact’s name, company name and other fields.
- Click on submit button.
- All the details of the available contacts will be displayed; you can either view or edit them, if needed.
- To view any details of the particular contacts, search with their name in the search field. .
- Watch Video
Companies
To add the comapany's details:
Click on companies option in the side bar.
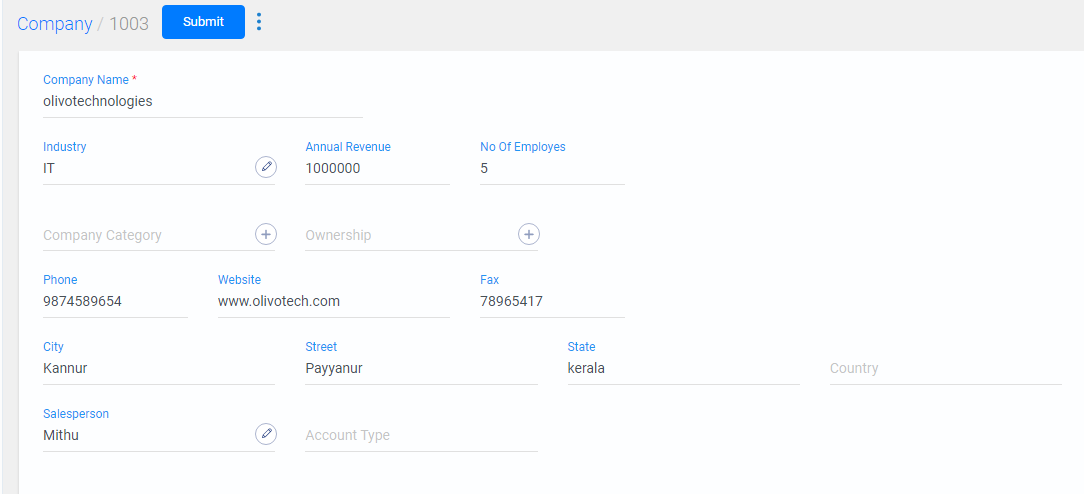
- To add a new company details, click on create new button.
- Enter the company name and other contact details.
-
Select the industry type from the available list or
create new by clicking on the
 icon.
icon.
- Click on submit button.
- All the details of the available companies will be displayed; you can either view or edit them, if needed.
- To view any details of a particular company, search with their name in the search field. .
Projects
To add a project’s details:
Click on Projects option in the side bar.
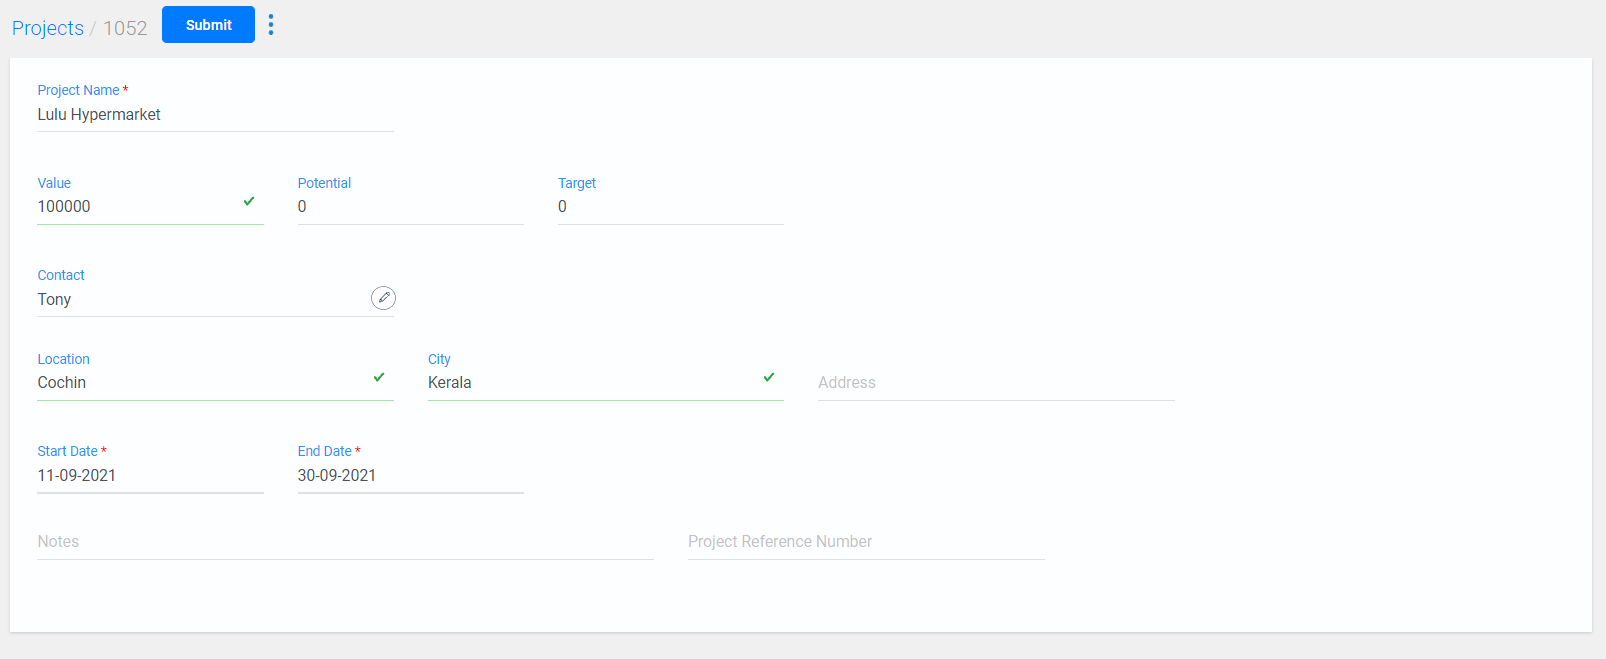
- To add a new project detail, click on create new button.
- Enter the project name, value of the project in amount, potential amount and the target amount to complete the project.
- Enter the location name and contact person's name.
- Select the start and end date of the project.
- Click on submit button.
- All the details of the available projects will be displayed; you can either view or edit them, if needed.
- To view any details of a particular project, search with their name in the search field. .
Work Flow
To add a new work flow,
Click on Workflow option in the side bar.
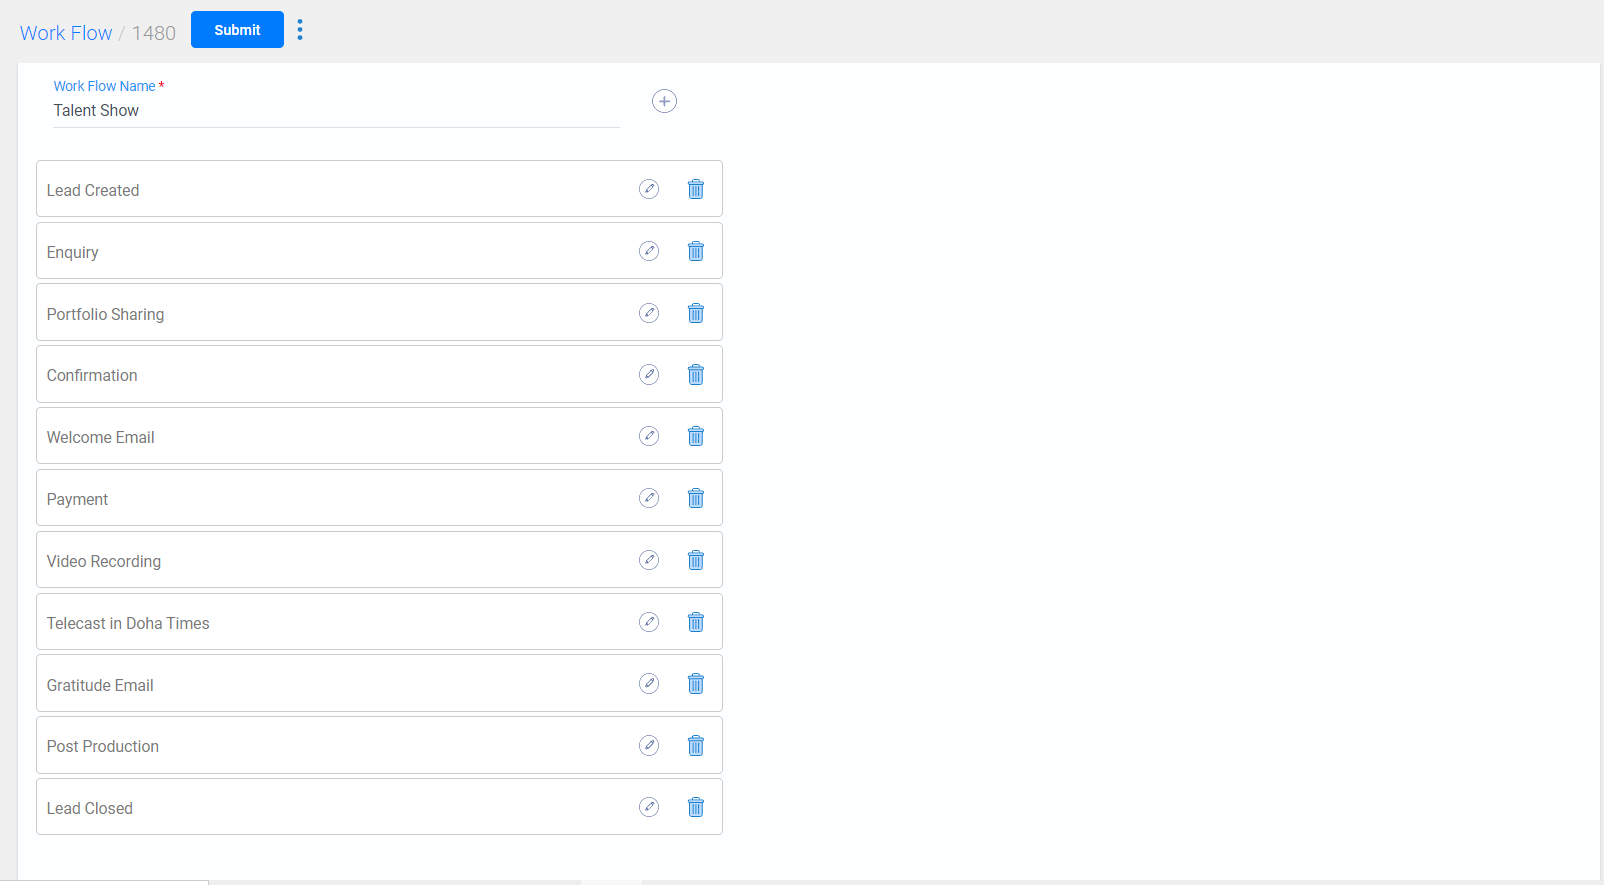
- To add a new workflow, click on create new button.
- Enter a name for the workflow.
-
Click the icon
 to add a new activity to the
workflow.
- Enter the activity description and its type.
- Set remainder for the activity if needed.
- Click on submit button.
- Activities will be created between opportunity created and closed.
- All the details of the available workflow with number of activities in it will be displayed; you can either view or edit them, if needed.
- To view any details of the particular workflow, search with its name in the search field. .
- Watch Video
My Activities
To view/schedule an activity :
Click on My Activity option in the side bar.
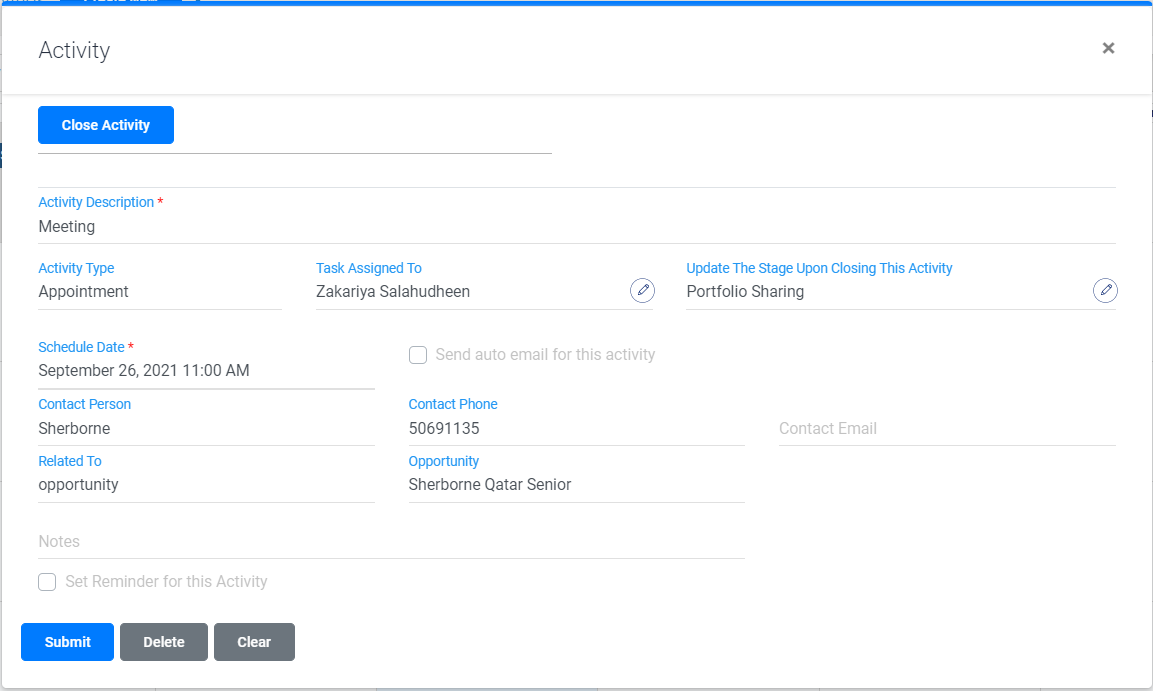
- You can create a new activity by clicking on create new button.
- Enter the description and type of the activity.
- Enter the scheduled date for the activity and the contact person's details.
- Click on submit button.
- The activities scheduled for the user will displayed.
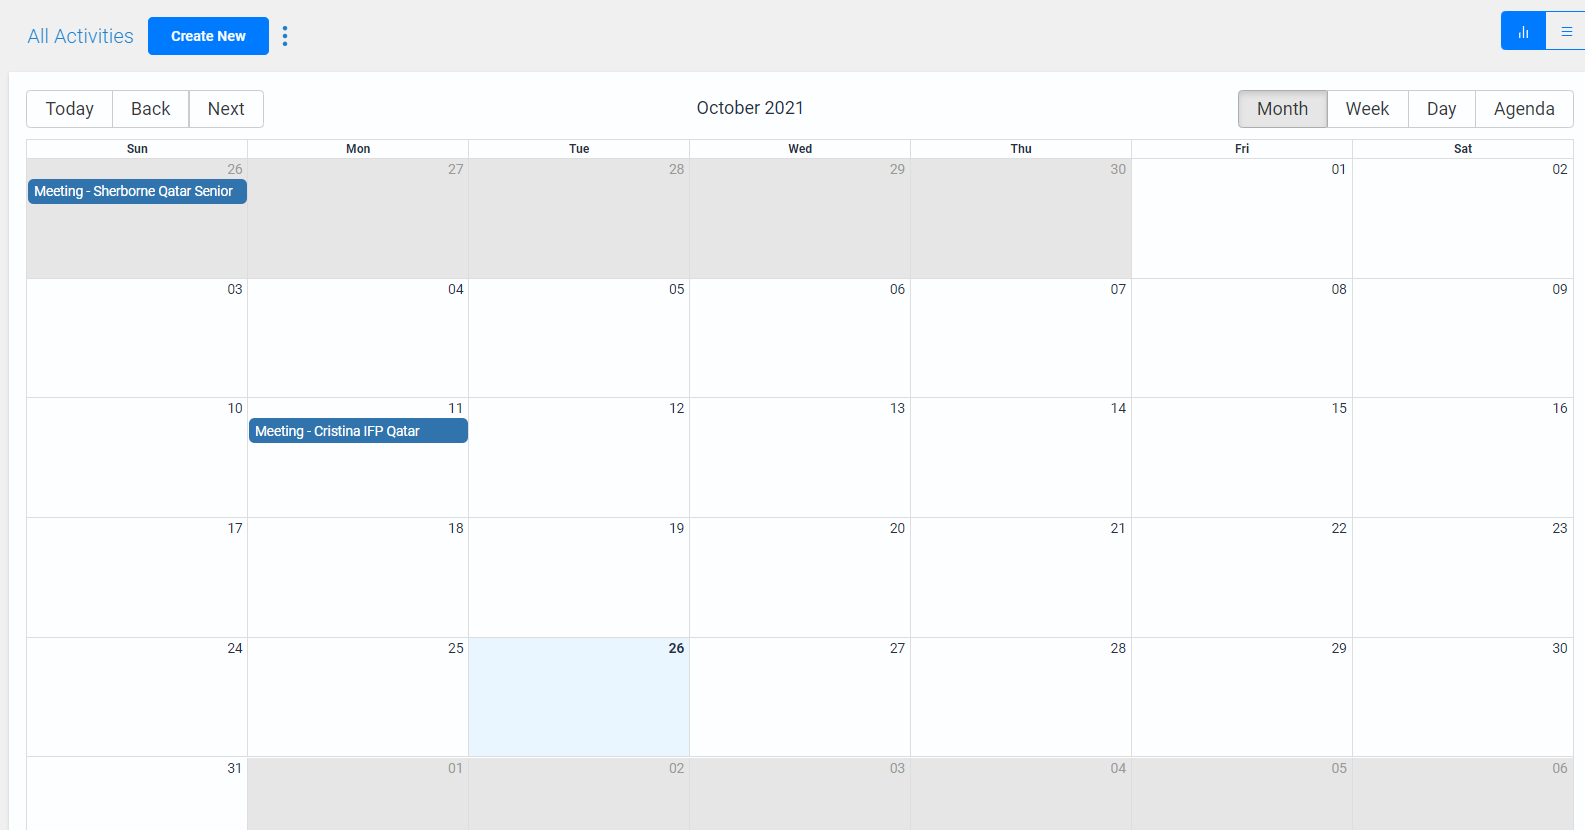
- Schedules can be viewed for the particular day, week or month.
- Agenda (Appointment diary) will also be displayed.
-
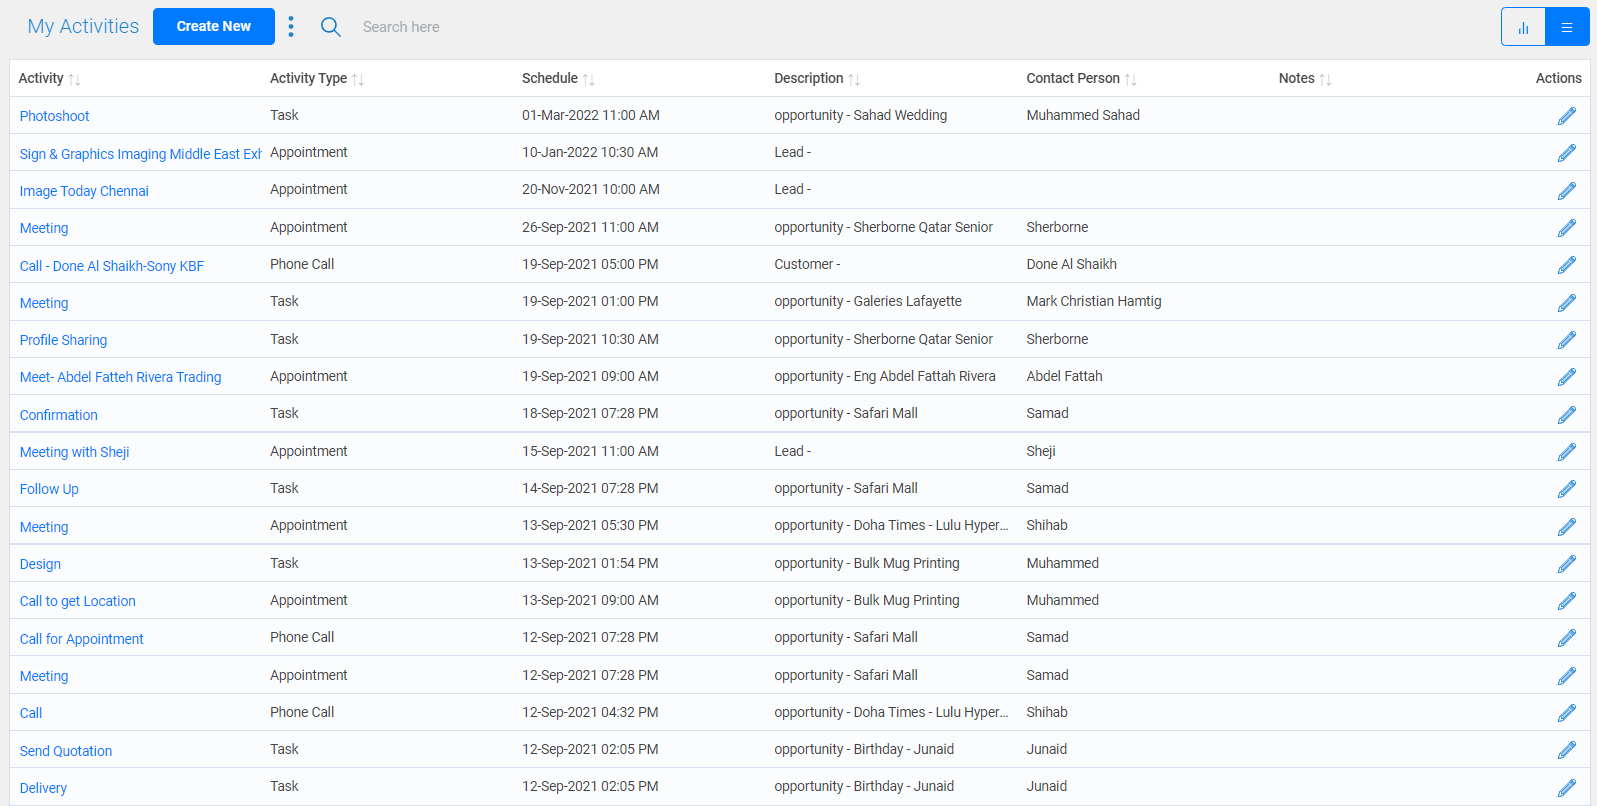
View type can be changed as list view
of the all your activities by clicking on
icon.
All Activities
To view/schedule an activity :
Click on All Activity option in the side bar.
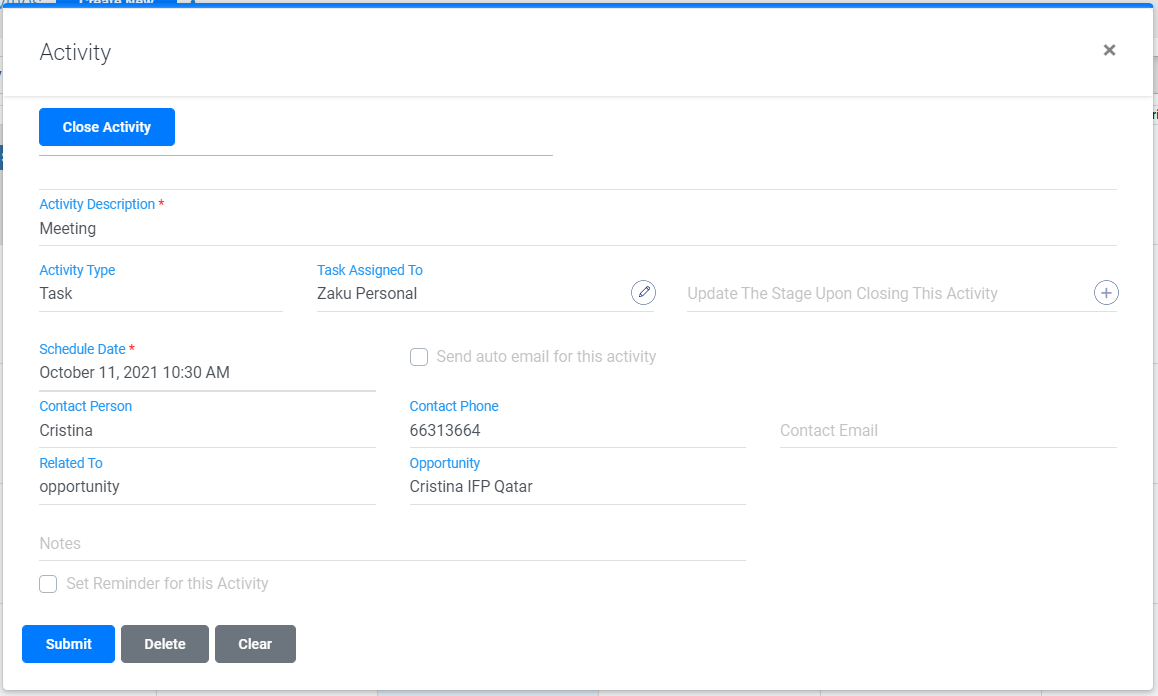
- You can create a new activity by clicking on create new button.
- Enter the description and type of the activity.
- Enter the scheduled date for the activity and the contact person's details.
- Click on submit button.
- The activities scheduled for all the users will displayed.
- Schedules can be viewed for the particular day, week or month.
- Agenda (Appointment diary) will also be displayed.
