Sales Module
This module is used to create all the transactions for your customers.
In this module you can,
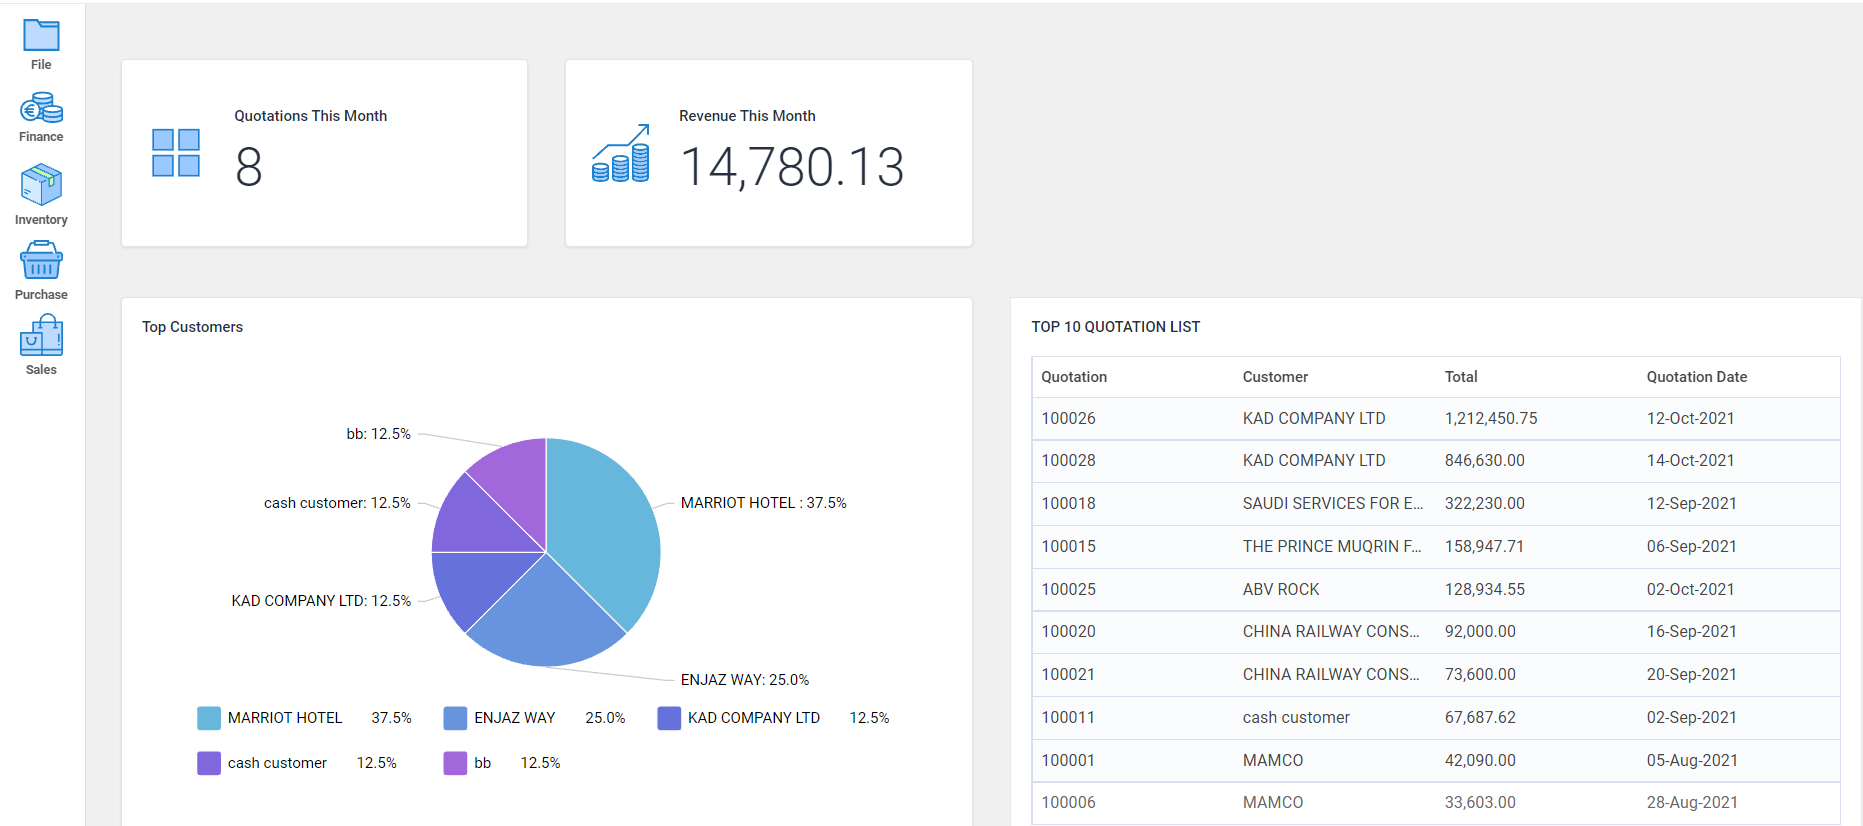
Sales Dashboard
This page displays the overall pictorial representation of data regarding sales, revenues, quotations, customers and list of your top orders.
Go to Sales -> Sales Dashboard
Sales Quotation
To create a new sales quotation,
Go to Sales ->Sales Quotation

- To create a new sales quotation, click on Click new button.
-
Select customer from the list or you can create a new customer's detail by clicking on the
 button.
 - Select the product from the list.
- The quantity, unit and unit price values mentioned in the product screen will be displayed.
- Net amount including discounts and other charges (if it is given) will be displayed.
- Then click on submit button.
- You can convert a sales quotation to sales order by clicking on the
 button.
 - All the details of the previous sales quotation will be displayed; you can either view or edit them if needed.
- To view any details of the previous sales quotation, search with its customer name in the search field.
Sales Order
To create a new sales order:
Go to Sales -> Sales Order
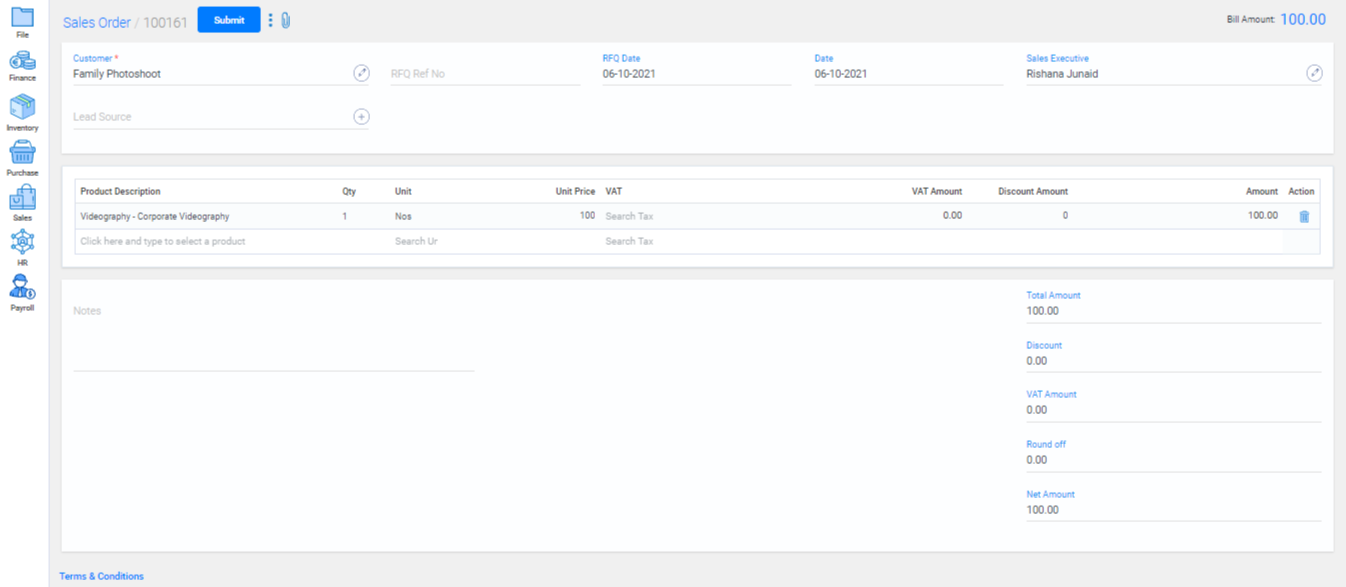
- To create a new sales order, click on create new button.
-
Select customer from the list or you can create a new customer by clicking on the
 button.
 - Select the product from the list.
- The quantity, unit and unit price values mentioned in the product screen will be displayed.
- Net amount including discounts and other charges (if it is given) will be displayed.
- Attach documents if provided.
- You can add any payment terms if any from by clicking on button.
- Then click on submit button.
- You can convert a sales order to sales invoice by clicking on the button.
- All the details of the previous sales order will be displayed; you can either view or edit them if needed.
- To view any details of the previous sales orders, search with its customer name in the search field. .
Sales Invoice
To enter an invoice for sold product,
Go to Sales -> Sales Invoice
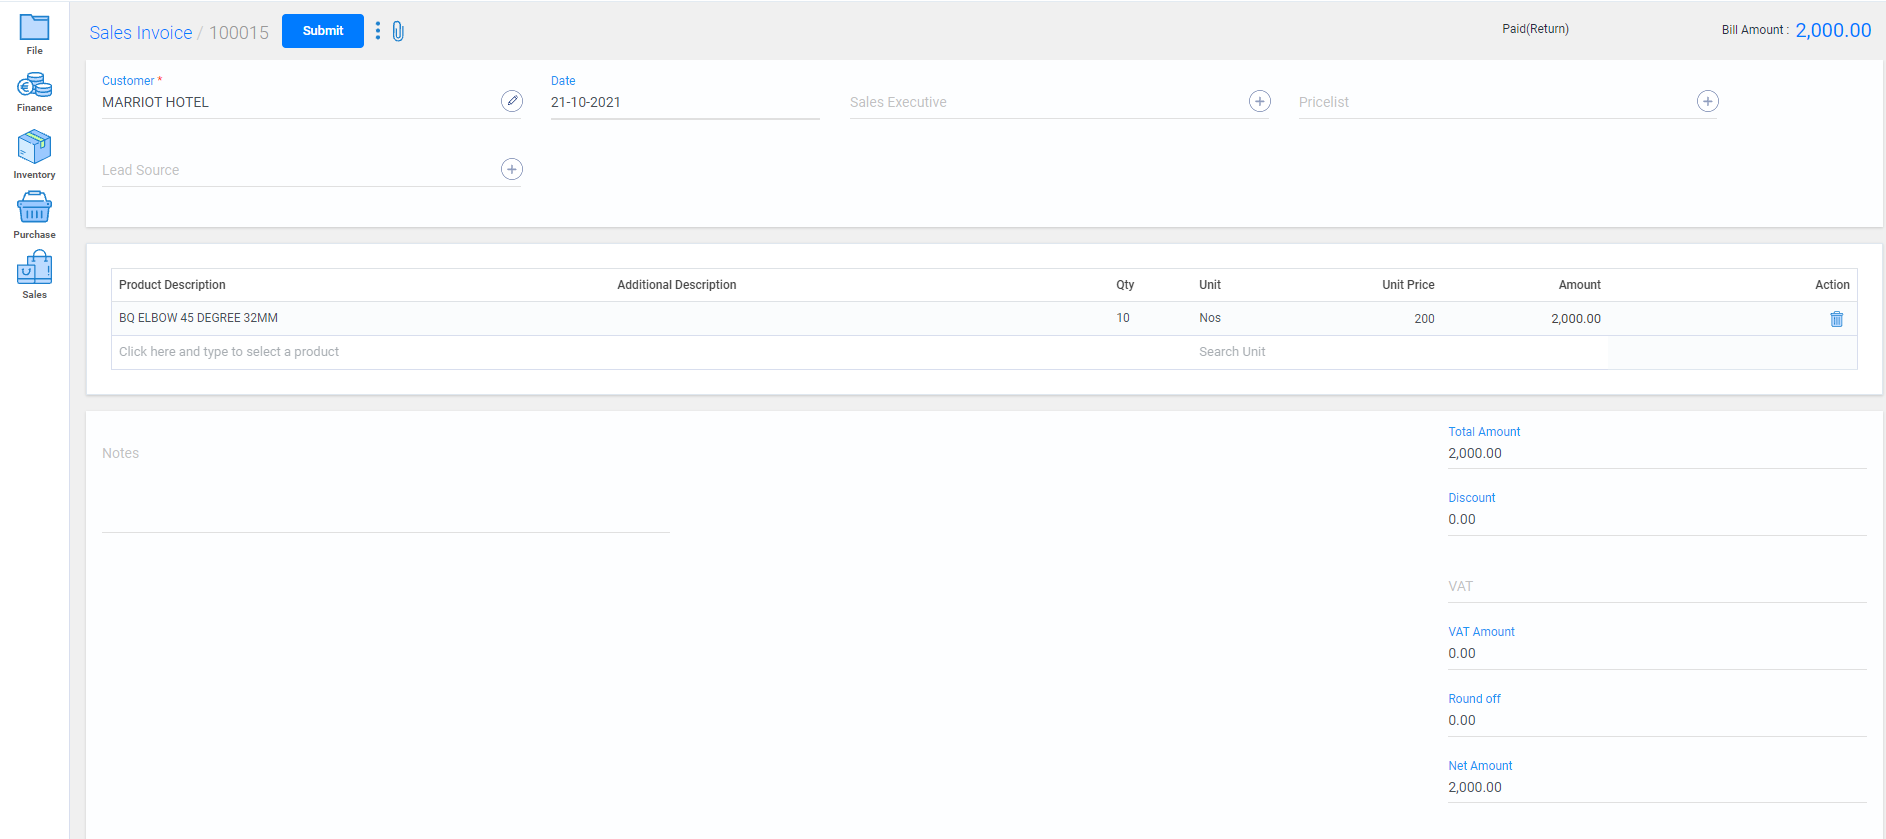
- To create a new sales invoice, click on create new button.
- Select customer from the list or you can create a new customer by clicking on the button.
- Current date will be displayed as default date. If the transaction was on any other day, enter the particular date in the field.
- Select Sales Executive, Lead Source, Price Lists from the list or you can create a new entry by clicking on the button if needed.
- Invoice number will be auto generated.
- Select the product from the list.
- Enter the quantity and price.
- Enter the other fields like VAT charge, discount and round off if any.
- You can add any new, payment type if any by clicking on the button.
- You can create pro forma invoice or sales invoice if needed by clicking on the button.
- You can confirm the details then click on the submit button.
- All the details of the invoices will be displayed; you can either view or edit them if needed.
- To view any details of the previous sales invoices, search with its customer name in the search field.
- Watch Video
Sales Return
If any sales product has been returned,
Go to Sales -> Sales Return
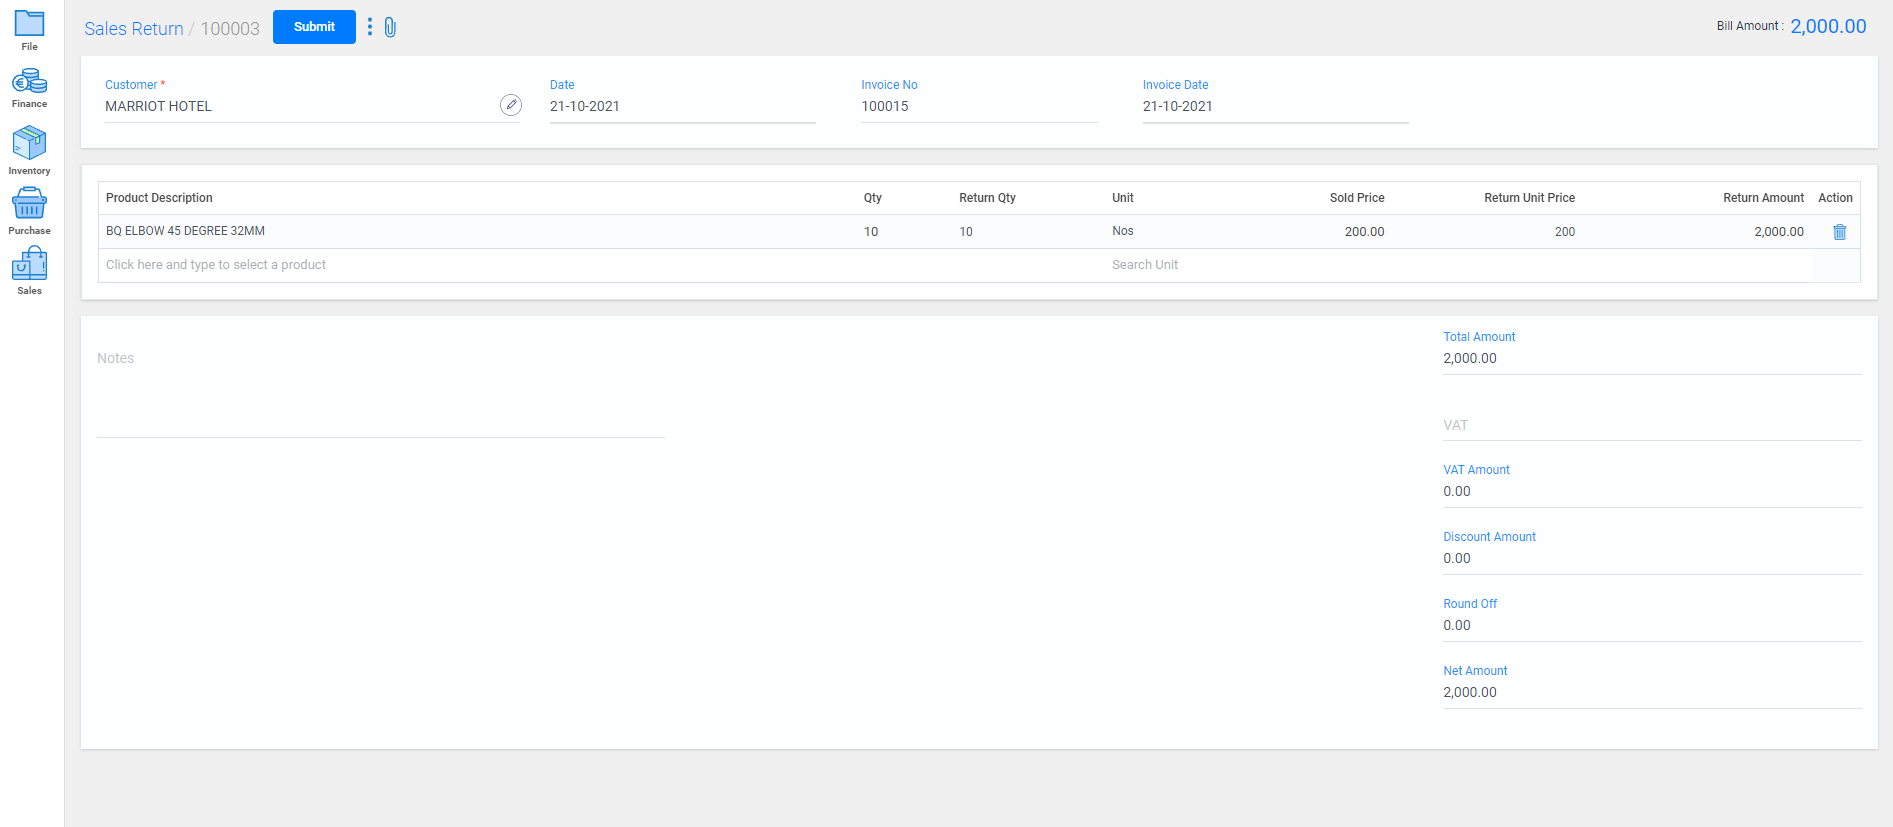
- To create a new sale return, click on the create new button.
- Select customer from the list or you can create a new customer by clicking on the button.
- Current date will be displayed as default date. If the transaction was on any other day, enter the particular date in the field.
- Enter the invoice date.
- Enter the product details and quantity to be returned.
- Enter return quantity, to get return amount displayed.
- Click on the submit button.
- All the details of the returns will be displayed; you can either view or edit them if needed.
- To view any details of the previous sales return, search with its customer name in the search field.
Customer Payment
To add an entry when a payment is received,
Go to Sales -> Customer Payment
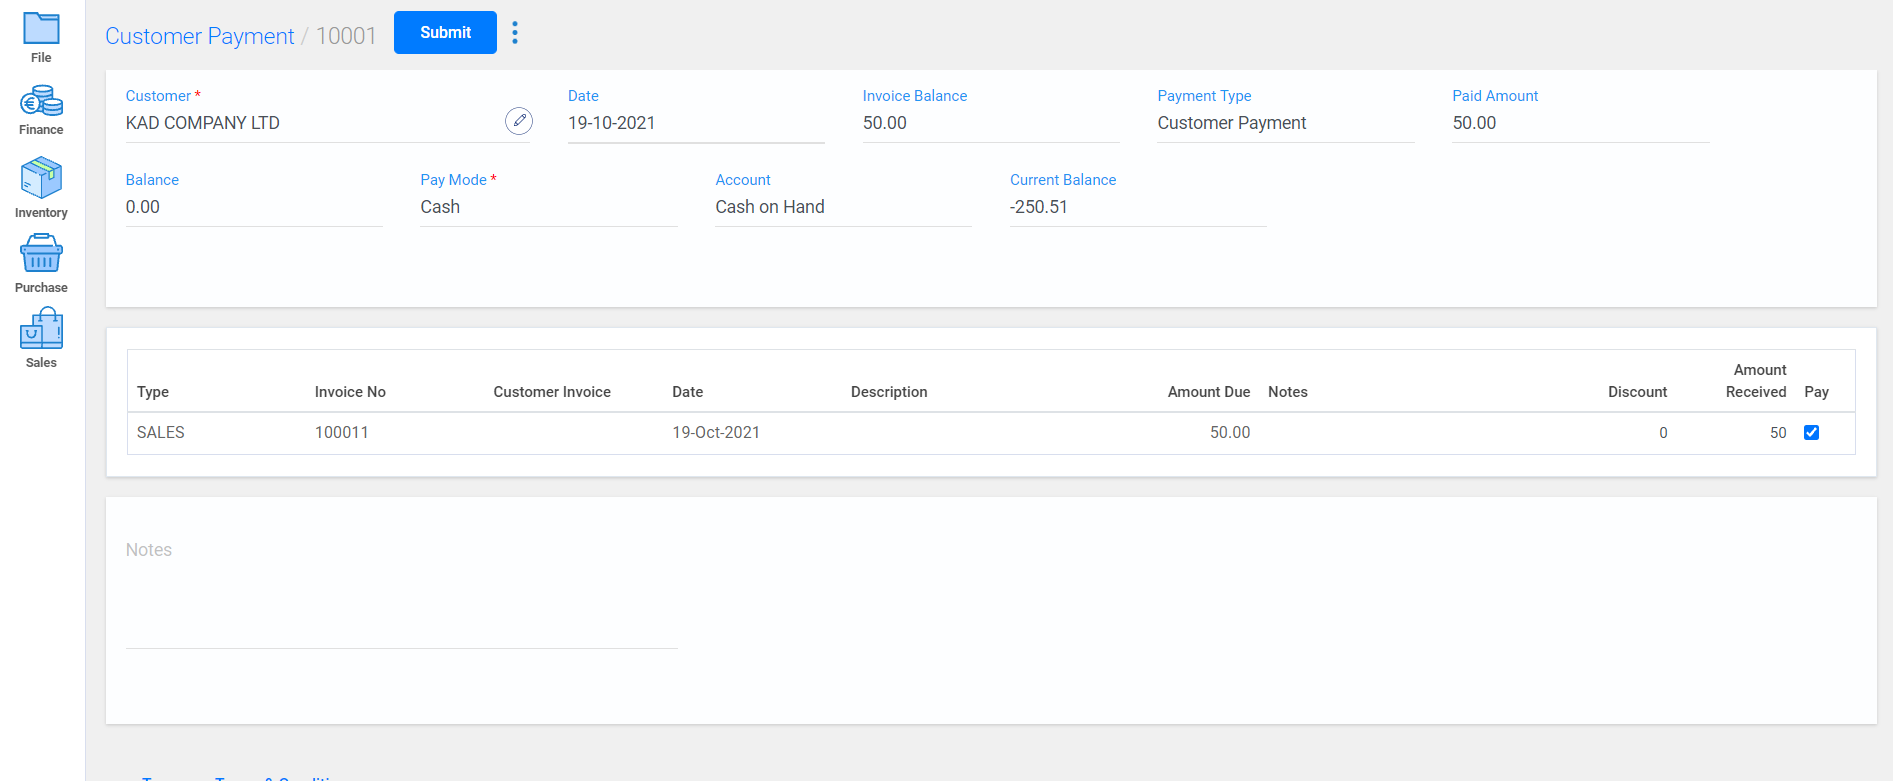
- To create a new sales invoice, click on create new button.
- Select customer from the list or you can create a new customer by clicking on the button.
- Select the pay mode. For payments other than cash provide the banking details as needed.
- If the payment has been done, select the pay checkbox.
- Click on the submit button.
- Then confirmation message customer payment successful will be displayed.
- To enter the advance amount details paid by the customer,
- All the details of the previous payments will be displayed; you can either view or edit them if needed.
- To view any details of the particular customer's payment details, search with its customer name in the search field.
- Watch Video
Customer Credit Note
To enter the customer credit details:
Go to Sales -> Customer credit note

- To create a new credit note, click on create new button.
- Select customer from the list or you can create a new customer by clicking on the button.
- Current date will be displayed as default date. If the transaction was on any other day, enter the particular date in the field.
- Enter the account name of the customer, amount and VAT details.
- Click on the submit button.
- All the details of the previous credit notes will be displayed; you can either view or edit them if needed.
- To view any details of particular customer’s credit note, search with its customer name in the search field..
Customer Debit Note
To enter the customer debit details:
Go to Sales -> Customer debit note

- To create a new debit note, click on create new button.
- Select Customer from the list or you can create a new customer by clicking on thein button.
- Current date will be displayed as default date. If the transaction was on any other day, enter the particular date in the field.
- Enter the account name of the customer, amount and VAT details.
- Click on the submit button.
- All the details of the previous debit notes will be displayed; you can either view or edit them if needed.
- To view any details of particular customer’s debit note, search with its customer name in the search field. .
Customers
To add a customer's details,
Go to Sales -> Customers
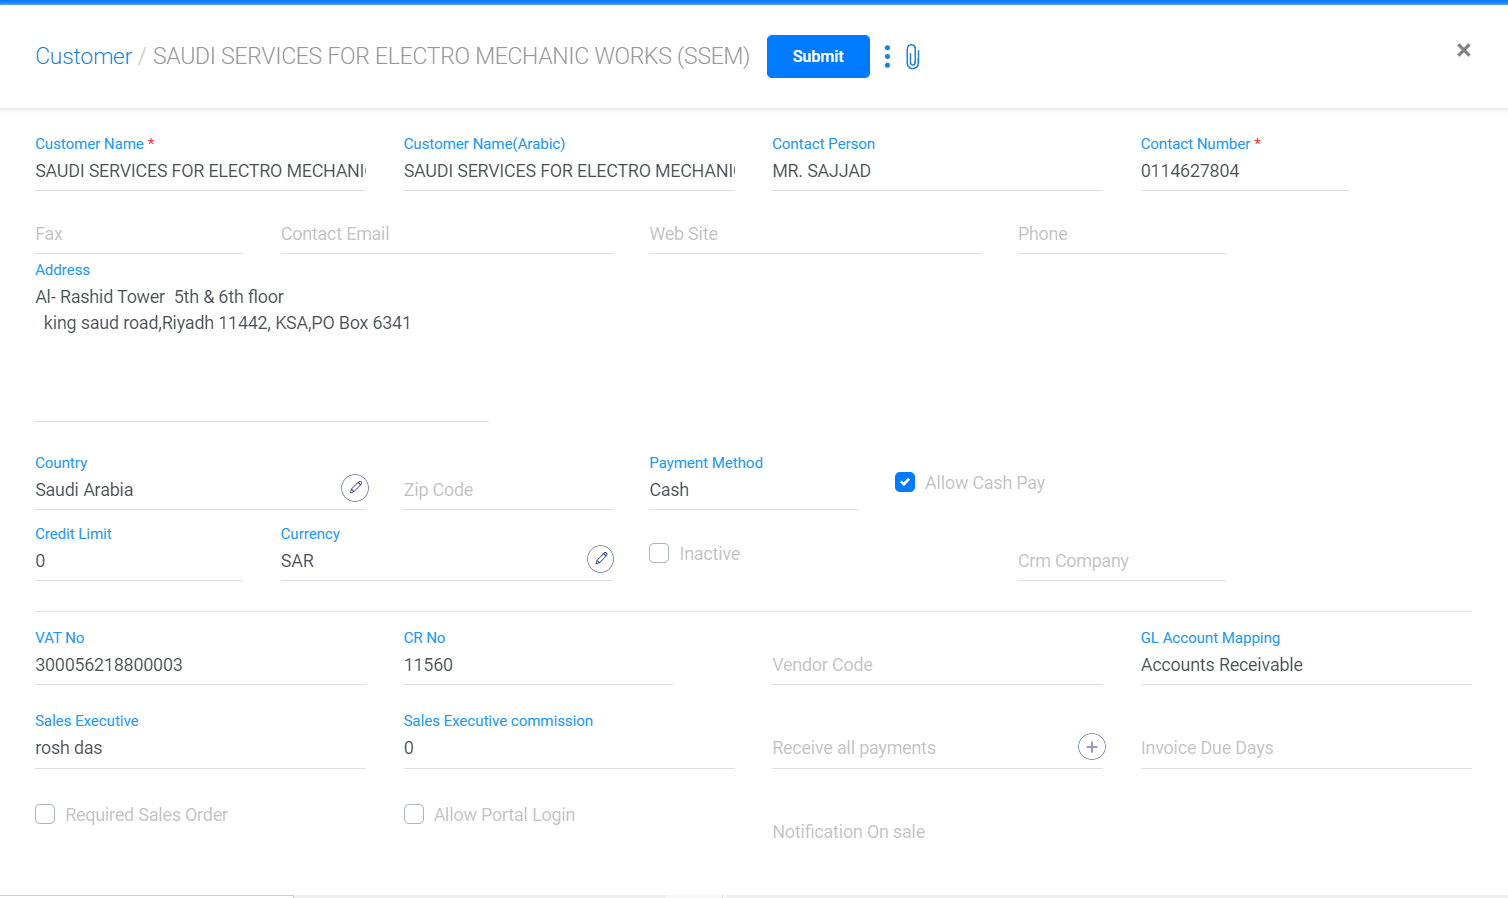
- To add a new customer detail, click on Create new button.
- Enter the customer’s name and other mandatory fields to proceed.
- Enter the other field entries if needed.
- Click on the submit button
- All the details of the available customers will be displayed; you can either view or edit them if needed.
- To view any details of the particular customer’s details, search with their name in the search field.
- Watch Video
Sales Reports
This module generates reports regarding all the sales details.
Go to Sales -> Sales reports
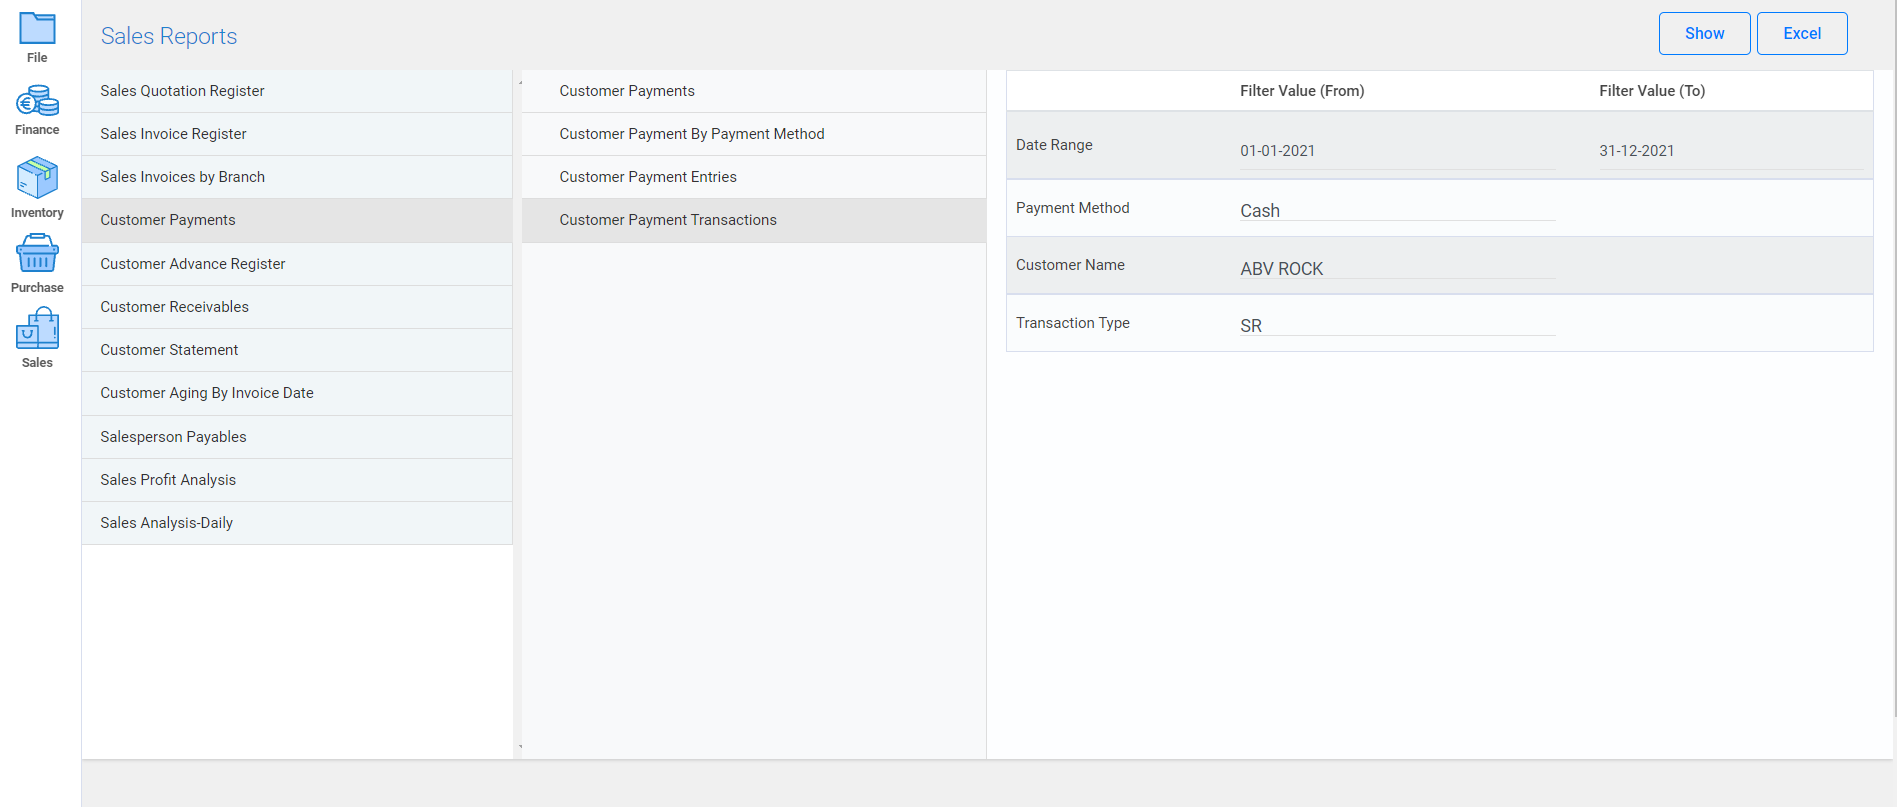
- You can view the detailed reports by filtering from the required fields.